Azure Virtual Network Security Groups or NGS have been around for a long, long time and have (or at least should have) formed an integral part of your multi-layered network security. I say ‘should have’ because I have seen many instances where NSGs have either been overlooked all together or very poorly implemented. The reason for this is usually down to the singular approach to management them. You must manage and maintain each NSG independently, easy enough in a small environment but incredibly difficult and time consuming in even a medium environment and even using code doesn’t help remove all the effort. FINALLY, there is a solution inbound that can help – Azure Virtual Network Manager or AVNM, a service that will help enforce a central standard for NGS, automatically apply configurations and perform at scale.
This is currently a preview feature; all the usual warnings apply – don’t use in production etc. but also, it’s currently free (until March 1st of 2022) to have a play in your demo environments. You will need to register your subscription with the preview feature:

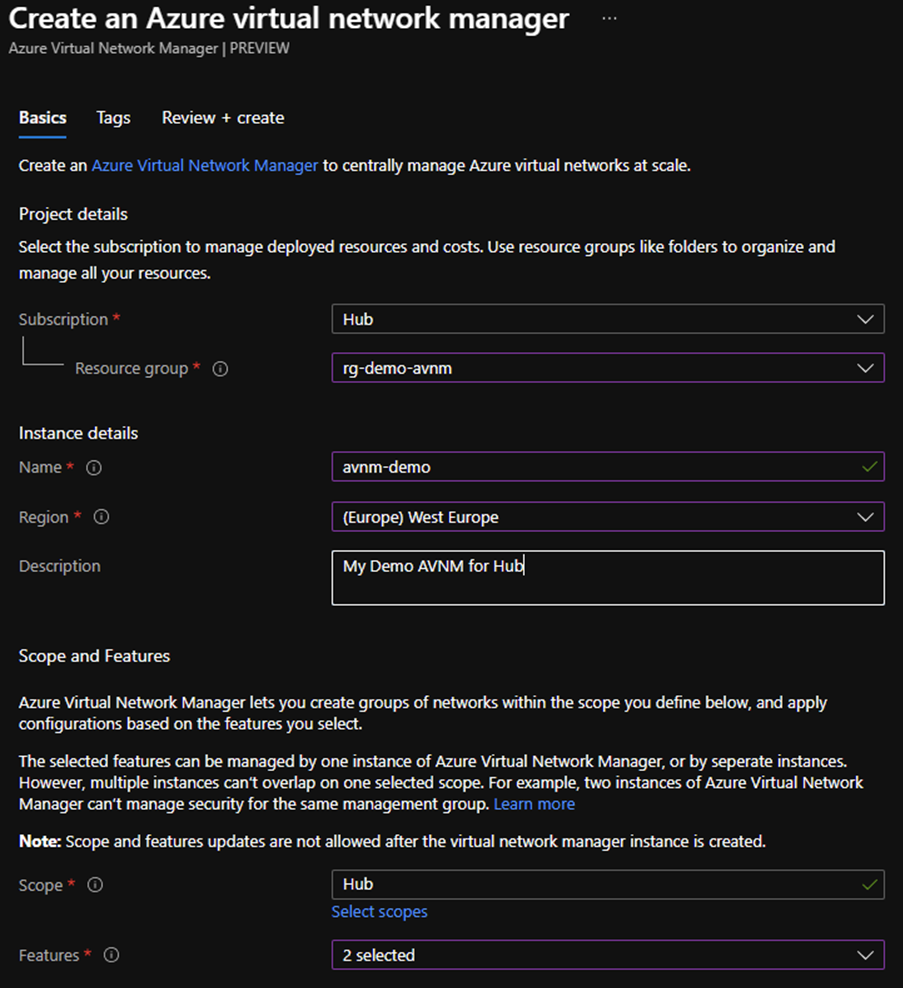
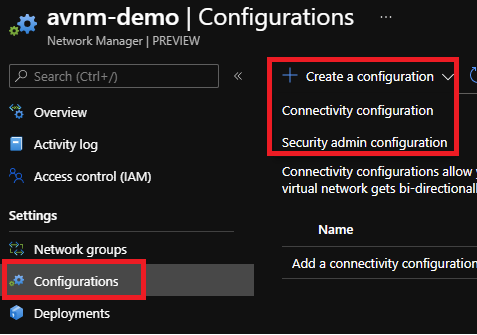
Setting up the AVNM Instance
There are currently limitations as to where you can deploy your AVNM instance there are the usual US & Europe suspects on the list.
Scope
You select the scope (management group) of where you would like to manage the networks – for example, you may have a Management Group hierarchy that has a MG for Production and one for test. In this instance you would create two AVNM instances if you wanted to manage both.
Features
With a AVNM you manage both the network hierarchy (connectivity) and the security rules that apply to networks – you can either use one AVNM to manage both features or a separate one to manage the features separately (or just one and just manage security rules as an example). The important thing is here you can only have features managed by one AVNM per-instance. For example, you cannot create two AVNM instances per-scope and have both manage security.
Note: It’s important to get the scope and feature configuration right here first time as you cannot change this after the instance has been built.
Configuring your AVNM Instance
Once we have our instance configured there are three steps we must go through to configure the AVNM instance.

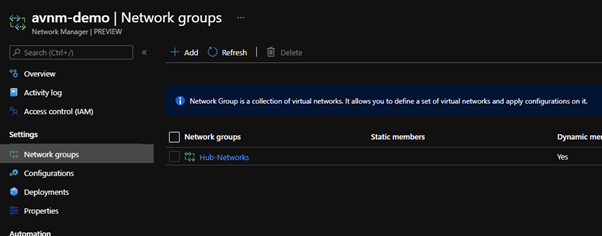
Creating the network group
The network group, as the name suggests, is a collection of virtual networks that you will manage together. You can either statically select the networks you wish to be included or you can create a dynamic membership query – this includes any VNets that are created later so super handy for environments that will frequently change. Don’t forget the VNets you can target here are the ones that fall under the management group you selected earlier. As an example: Although I have three networks – two in Hub and one in Prod and all three starting with VN-
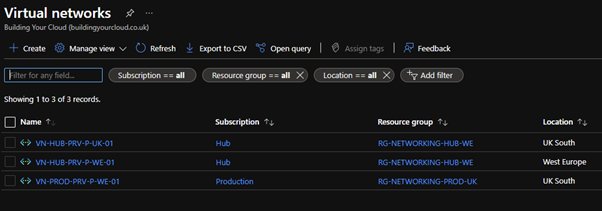
If I build a dynamic query to include ALL networks that include the letters ‘VN-‘ only the HUB networks are included, one in UK South and one in West Europe.
This is because my Prod subscription is under a different management group. If I wanted to include Production too I would either need to create a new AVNM or select a management group higher up the tree that would cover both.
Once I have finished added the dynamic rules or selecting the networks manually, I have successfully added a network group.
Configurations
As I selected both ‘Connectivity’ and ‘Security’ features when creating my AVNM I can see both configuration options:
Connectivity Configurations
There are two types of connectivity you can create – either a traditional ‘Hub and Spoke’ model or a mesh model.
Mesh The Mesh configuration enables you to configure connectivity between all virtual networks in the Network group. A virtual network can be configured to up to five connected groups and if you enable global mesh the connectovity can be between VNets in different regions (effectively Global VNet peering).
If you are using NVAS, Azure Firewalls or Connectivity such as ExpressRoute or VPN etc. you will want to be very mindful about how routing will work. It’s also very important that IP address ranges do not overlap.
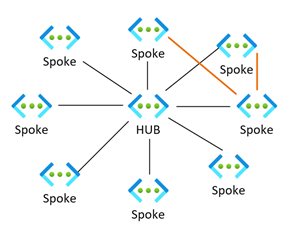
Hub and Spoke
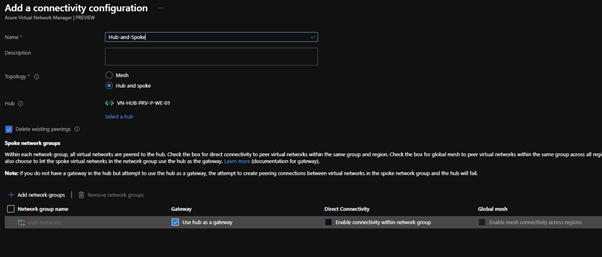
The Hub and Spoke connectivity configuration enable you to bi-directional peer (just a standard VNET peer, if a peer exists you can optionally delete it before the configuration is deployed) to all the other VNETs in the selected Network Groups. You Select which is your Hub and if the Hub should be used as a gateway transit if you have an ExpressRoute or VPN gateway.
Direct Connectivity You will also see two other checkbox options for Direct Connectivity and Global Mesh. Direct Connectivity is for the times when you need to directly connect spoke networks together within the same region or enable Global Mesh for spokes that are not in the same region. The orange peers in my example below.
There are a few important things to note here with routing. A VM in a spoke network when routing to the Hub VNet would have a next hop type of ‘VNetPeering’ or ‘GlobalVNetPeering’ depending on the regions. Whereas the connectivity between the two spoke networks would have a next hop type of ‘ConnectedGroup’. It’s important to consider this with any custom routing you may need.
Connectivity Configurations
Just as you would with individual NSGs you can configure rules; allow and deny rules but also a ‘Always allow’ rule. Always allow will allow regardless of any lower priority rules or user defined NSGs, think of it like an override.
Adding a rule is almost identical as configuring an NSG and you can service tags as you usually would.
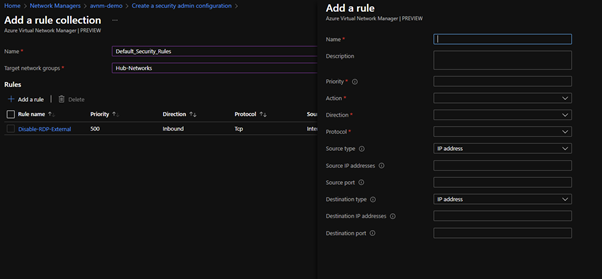
NSG vs. Security admin rules Deploying a Security admin rule to a Virtual Network in the Target Network Group does not change any user defined NSG rules that already apply; instead, the Security admin rules apply first followed by the NSG rules. If there is a Deny rule defined in the Security admin rule set it will apply first before the NSG rules.
Deployments
Once you have configured the Network Groups and created the security and connectivity configuration you need you must deploy the configuration to the VNets. Under ‘Deployments’ you can create the deployments for both the Connectivity and Security admin.
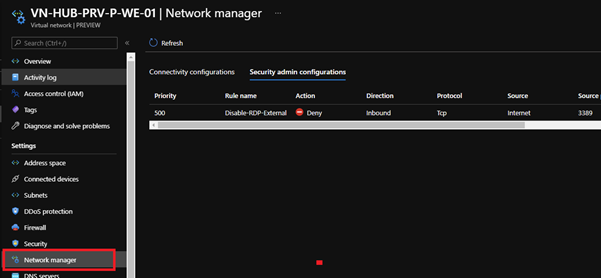
Security admin
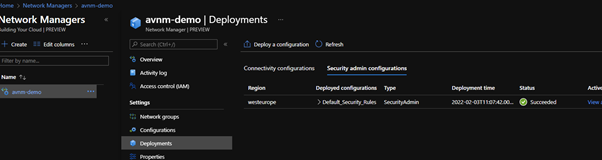
If you view one of the VNets you can see the rule that we created in the Security admin configuration has been successfully applied.
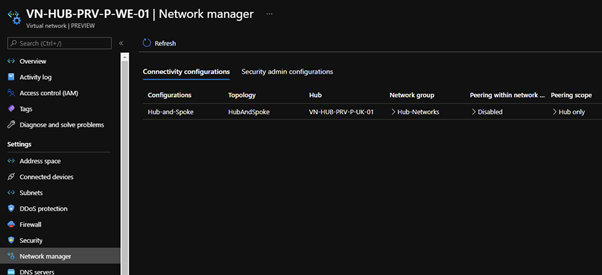
Connectivity
When deploying the Connectivity configuration, you can see this has been applied to the VNet:
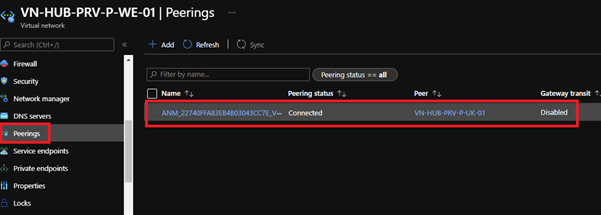
Under peerings you can see AVNM has created the necessary network peer:
Conclusion
This is a fantastic addition to centralising your connectivity and especially your security administration. This will hopefully make it much easier for you to apply good security practises and to apply security prevent lateral movement and network security improvements at all levels of the network.